

When Lifecycle Setup Happens
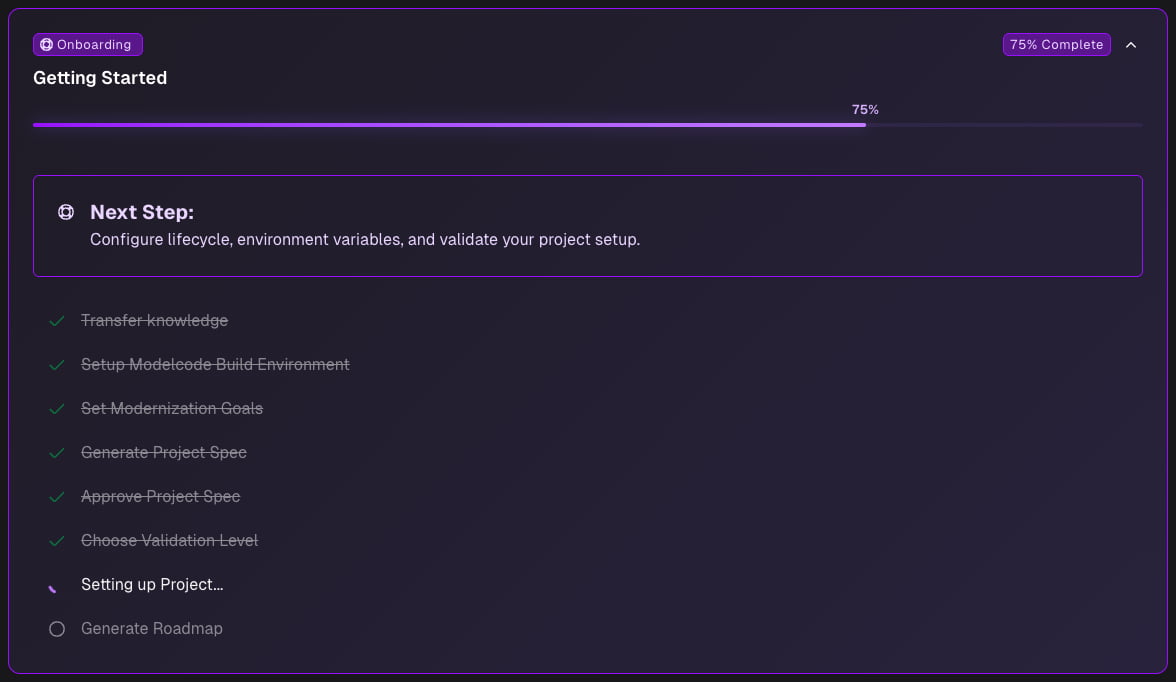
Project Setup is a stage on the Roadmap onboarding checklist. It runs after you approve the Project Spec and choose a validation level:- Setup Build Environment
- Set Modernization Goals
- Generate Project Spec
- Approve Project Spec
- Choose Validation Level
- Project Setup ← lifecycle setup happens here
- Generate Roadmap
Setting Up the Lifecycle in Chat
The first time you land in Project Setup, the drawer is chat only — there is no tree or content pane yet, because there is nothing to show until the agent discovers it. The chat opens on “Welcome! Time to set up the project and get started” and starts working. While the sandbox boots, the chat shows its progress: allocating resources, cloning the repository, installing dependencies, indexing project context. The tree and content pane appear alongside the chat as soon as the agent has something to put in them.What the agent works through
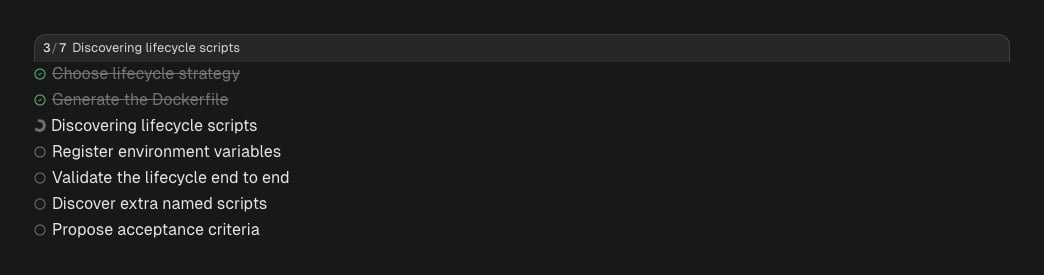
The agent maintains a visible to-do list and works through it in order. Which items appear depends on your build environment:
Once the lifecycle validates, the agent asks a single question: whether you want to set up acceptance criteria. Answer Skip — I’ll do this later and the last three phases are marked skipped and onboarding wraps up there; you can add scripts and criteria from the chat at any point afterwards.
On a self-hosted project that uses the connect strategy, the Dependencies phase is skipped too — the Morph Platform isn’t building or running the app, so there is no toolchain to resolve.
- Inventories the repository — framework, install/build/run commands, health-check signals, environment variables, external service dependencies — and reports what it found before writing anything.
- Proposes the phases and confirms them with you. Beyond the standard five, this can include steps like
migrateor per-service splits in multi-service projects. - Registers the scripts and environment variables, asking you for values it can’t infer.
- Executes the lifecycle end to end to prove it works. On failure it shows you the failing phase, the last lines of output, and a proposed fix before retrying.
Answering the agent’s questions
The agent asks structured questions rather than free-text prompts wherever it can. Pick one of the options or write your own, then click Submit. Skip leaves the decision to the agent.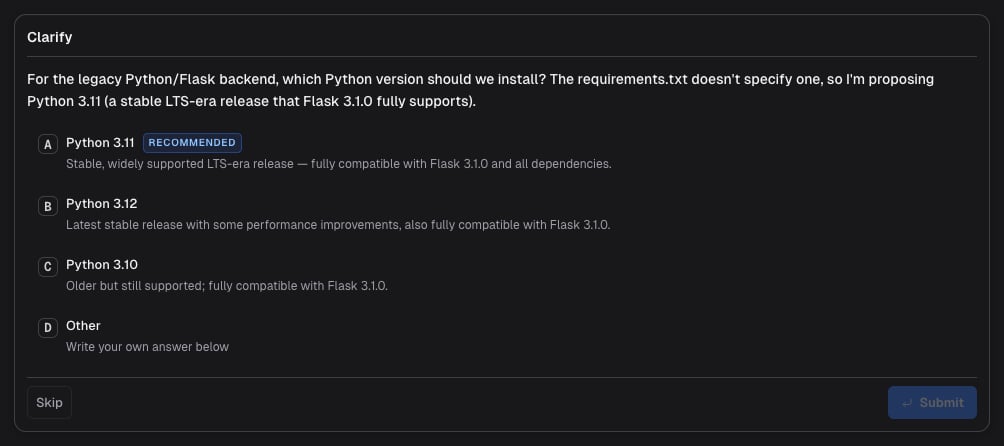
Providing secrets
When the lifecycle needs a credential — an API key, a database password, a service token — the agent asks for it with a Provide Secret card instead of asking you to type it into the chat. The value is encrypted immediately and is never shown to the agent or written into the transcript.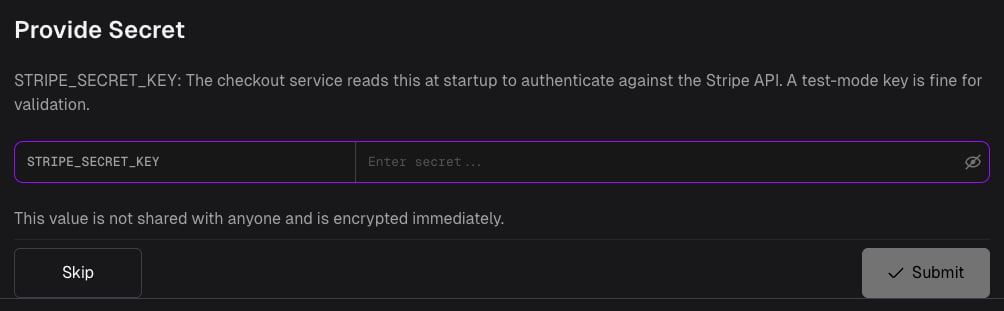
When setup finishes
Once the lifecycle validates, the chat confirms it and onboarding continues to Generate Roadmap. If the agent can’t get the application fully healthy, it asks you to confirm saving the configuration as a Draft so you can correct it yourself.The Project Setup Panel
Once the lifecycle exists, the drawer switches to its full layout: a tree on the left, the selected content in the middle, and chat on the right. Project Setup is the branch of the tree that holds everything the Morph Platform needs to run your application.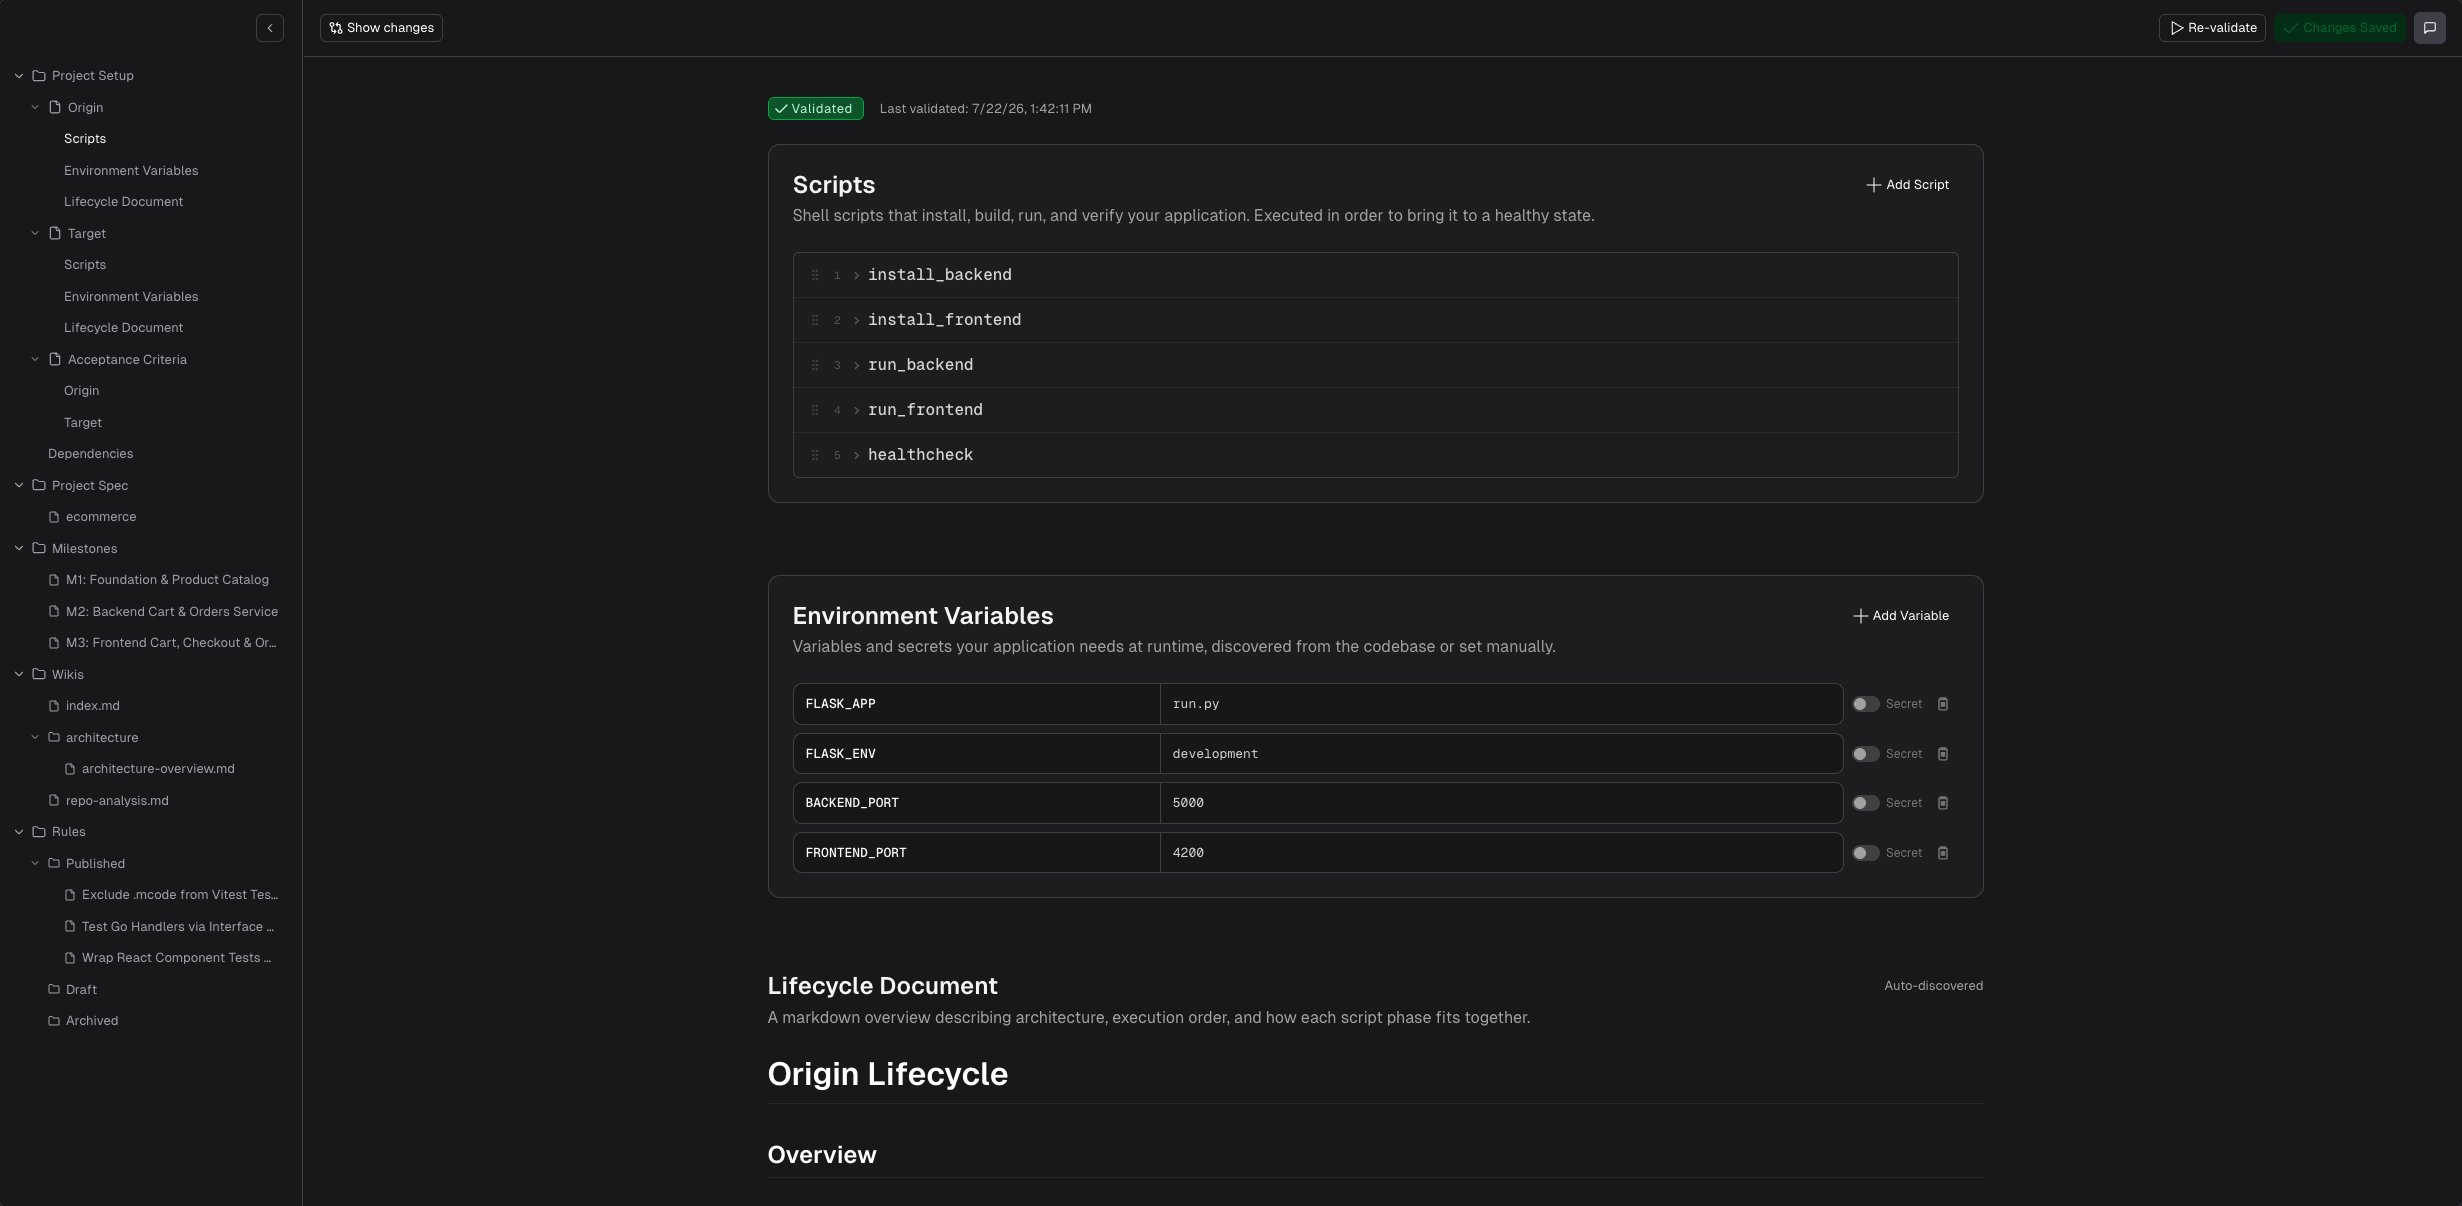
- Origin - How the source application builds and runs. Set up with you during Project Setup and used as the behavioral baseline for functional testing.
- Target - How the destination application builds and runs. Discovered automatically during the foundation milestone (Milestone 1). The Target entry stays disabled until then, with the tooltip “Available once a target lifecycle configuration has been discovered.”
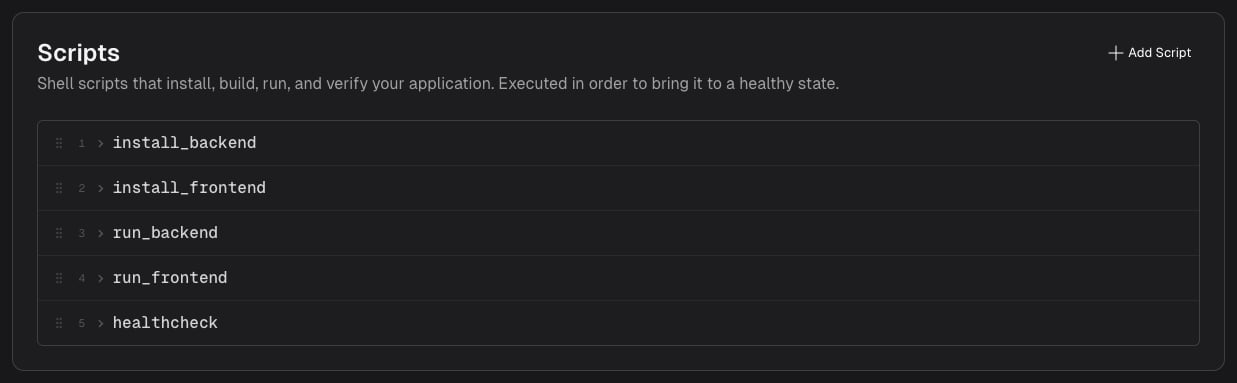
Scripts
Ordered shell scripts that bring your application to a healthy, running state. They run in the shell for your project’s platform — bash on Linux, PowerShell on Windows — which is fixed when you choose the platform during Build Environment setup, not by whichever daemon happens to pick up the work. Write them for that shell. Common scripts include:
Two of these are worth explaining, because they are the ones teams do not expect:
seed_db runs after build and before run. Many applications start but do nothing useful against an empty database, so separating “prepare the data” from “start the app” means the Morph Platform can restart your application without re-seeding it every time.
smoke is required for the origin application, and it is the check that makes validation meaningful. A health check tells you a process is listening; a smoke test tells you the application works. Until a smoke run passes, the Morph Platform does not treat your origin lifecycle as validated — even if every other script succeeded — because a migration validated against an application that was never really working proves nothing.
If your lifecycle looks validated and then returns to Draft, a failing or missing smoke script is the usual reason. The status banner names what needs attention.
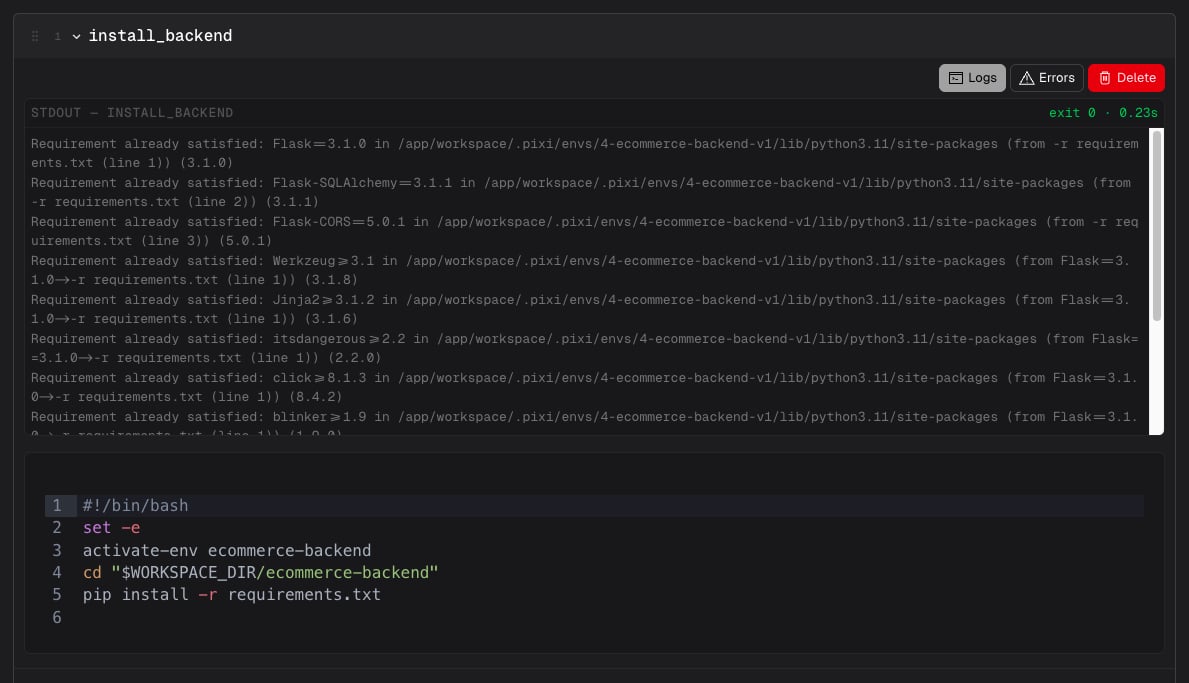
- Inline code editor - Edit the script content directly. Scripts are executed as shell commands.
- Logs - The stdout output from the last validation run, with the exit code and duration.
- Errors - The stderr output. A bug icon appears on the script header if the last run failed with stderr output.
Environment Variables
Key-value pairs your application needs at build or runtime. Variables discovered from the codebase are pre-populated; you can add, edit, or remove them with Add Variable. Variables marked as secrets are encrypted at rest. Tick the Secret checkbox on a variable to mark it as a secret; once marked, the value is masked and a show/hide eye icon appears so you can reveal it when needed.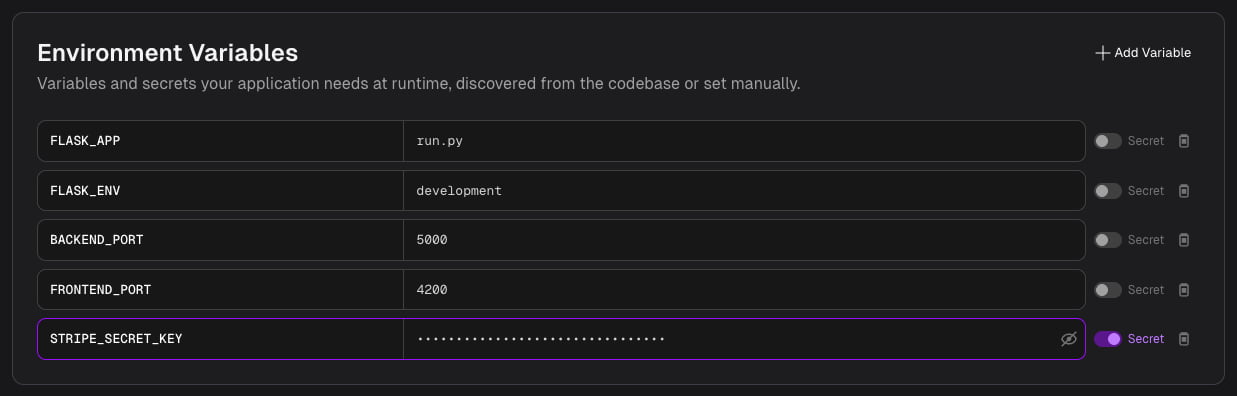
Lifecycle Document
A markdown overview describing how the application is structured, the execution order of scripts, and how each phase fits together. The agent generates it during Project Setup. It is displayed read-only in the panel — ask Knowledge chat to change it. A marker in the section header shows who wrote the configuration last: Auto-discovered when the agent did, User-modified once you save an edit of your own from the panel.Dockerfile and Dependencies
These artifacts are read-only in the panel too — they carry the hint “Read-only — ask the chat to update this.” To change the container image or the dependency manifest, ask Knowledge chat.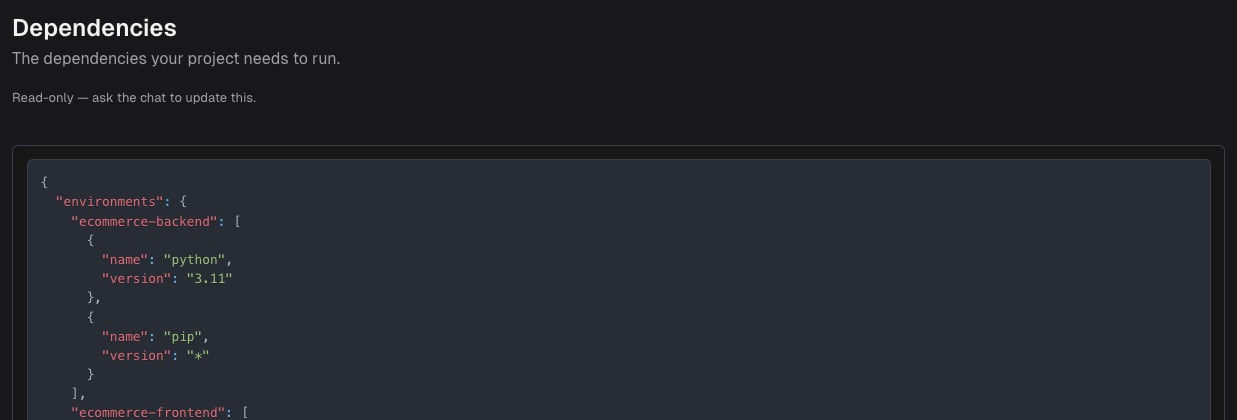
What You Edit Directly vs. What the Chat Owns
Both routes are available, and they write to the same configuration.
Only Scripts and Environment Variables are editable in place — everything else is displayed read-only and changed through the chat. Editing in the panel is best for a small, known correction: a wrong port, a typo in a command. Ask the chat when you want the agent to work out the change itself, touch several things at once, or investigate a failure.
Typical chat asks:
Validation Status
The status bar at the top of the Project Setup panel shows the current validation state:
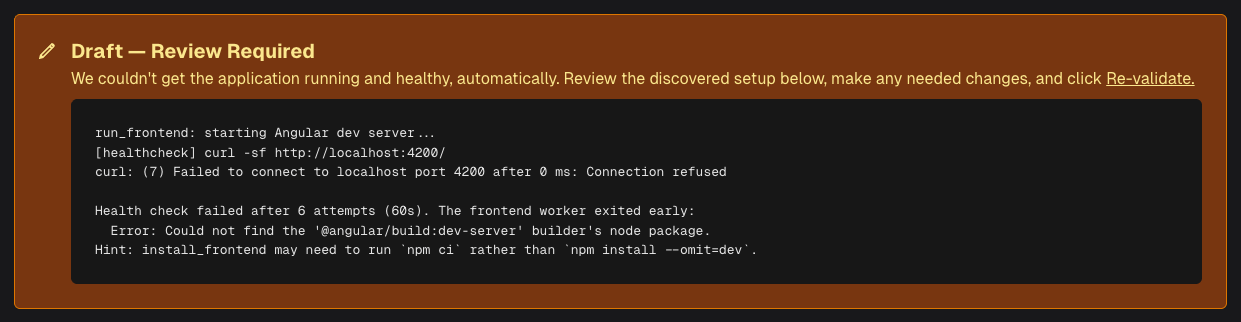
Saving any change to scripts or environment variables resets the status to Pending — the saved configuration hasn’t been proven to work until you re-validate.
Editing and Re-validating
After making changes in the panel:- Click Save Changes to persist your edits
- Click Re-validate to run the full validation sequence again

Authentication Handling
When the Morph Platform sets up or validates your lifecycle, it probes API routes beyond the health endpoint to check whether the application has authentication that could affect automated testing.What Morph handles automatically
The Morph Platform can detect and handle two types of authentication without manual intervention:- Disable flags — Many frameworks offer an environment variable or config setting that disables authentication in development or test mode (for example
DISABLE_AUTH=true,AUTH_ENABLED=false, or framework-specific flags likeEnableTesting). When the Morph Platform finds one, it registers the variable, restarts the application, and verifies that protected endpoints are now accessible. - Static tokens — If the application uses a fixed API key or Bearer token (e.g. an
X-API-Keyheader), the Morph Platform asks you for the token with a Provide Secret card, stores it encrypted, and adds a verification script that confirms the token works.
What requires your attention
- Session-based login (username/password) — Applications that require a
POST /logincall to obtain a session cookie or Bearer token. the Morph Platform reports this as detected but unsupported for automated bypass. - OAuth / SSO / MFA — External identity provider flows that involve browser redirects, third-party consent screens, or multi-factor challenges. These cannot be automated.

Manual steps for unsupported auth types
If the Morph Platform can’t figure out your application’s auth automatically, you can prepare the environment yourself so that protected surfaces become reachable. Below are common patterns — pick the one that fits your stack. You can apply any of them by asking the chat, or by editing the panel directly.Add a test-mode environment variable
Most frameworks have a way to relax or skip authentication in non-production environments. Add that variable to the Environment Variables section, for example:
Re-validate after the change so the Morph Platform confirms protected endpoints are now reachable.
Seed a test user and add a login script
If your application uses session or token-based authentication, the alternative is to give the Morph Platform a way in rather than switching authentication off. That takes two scripts:- A
seed_dbscript that creates a test user, using whatever your project already uses for this — your ORM’s console, a management command, a seed script, or a SQL fixture. - An
authcheckscript, ordered afterhealthcheck, that logs in as that user and confirms a protected endpoint responds. It should exit non-zero if that fails, so a broken login surfaces as a failed script rather than as confusing test results later.
- Store the test account’s credentials as secrets in the environment variables section so they are encrypted at rest.
Use the connect strategy with a pre-authenticated instance
When none of the above options work (e.g. OAuth with an external IdP that cannot be mocked), consider the connect strategy. Run the application yourself with authentication already configured, and point the Morph Platform at the live, authenticated instance. The Morph Platform skips install/build/run and only needs a base URL and health check.Origin and Target
The Morph Platform maintains separate lifecycle configurations for each side of the migration.
Target discovery reuses the origin configuration as a starting point, so a clean, accurate origin setup directly improves the target result. Both sides stay editable in the panel and through chat for the rest of the project.
Tips
- Check the Errors tab first. When a script fails, the stderr output usually points directly at the problem - a missing dependency, a wrong port, or a typo in the command.
- Keep scripts minimal. Each script runs in a fresh shell process. If two commands need to share shell context — activating a virtual environment before running a command, say — chain them in a single script: with
&&on Linux and macOS, and with;or separate lines on Windows. - You don’t need to change directory. The Morph Platform keeps the working directory consistent across every command in a job. Only
cdwhen a command has to run in a nested folder. - Set environment variables in the UI, not in your scripts. Variables added to the Environment Variables section are available to every script and can be encrypted if sensitive. A variable exported inside one script does not survive into the next.
- Private dependencies need credentials on the machine. Scripts run exactly as written. If your package manager needs to authenticate to a private repository, those credentials have to be present on the host already, or supplied as an encrypted environment variable.
- Use environment variables for configuration. Avoid hardcoding ports, database URLs, or API keys in scripts. Set them as environment variables so they are easy to change and can be encrypted if sensitive.
- Answer the agent’s questions rather than skipping them. A skipped question means the agent guesses, and a wrong guess usually surfaces later as a validation failure.
- Reuse a working setup. Once the lifecycle validates, it becomes available as Organizational Knowledge so the next project on the same repositories can import it and skip Project Setup.
Related Docs
Project Knowledge
The drawer that hosts Project Setup, Knowledge chat, and the rest of your project context
Lifecycle Strategy
Choose whether the agent builds and runs your app, or connects to a running one
Validation Level
Why Project Setup only runs at the High validation level
Acceptance Criteria
Quality gates built on top of your lifecycle scripts
Self Hosted
Run ModelDaemon on your own infrastructure for projects with private dependencies
Validation Hub
Where lifecycle script results are reported during milestone execution